Here are my experiences with screen printing along with my family over a 4th of July family picnic. I prepared all the screens ahead of time, and everyone brought there blank shirts. I was willing to buy a only moderate level of supplies for this project.
As with so many of my hobbies, this is another way to turn vector illustrations into custom physical objects.
1. The Design
Prepare a black and white design
I was largely printing original designs from Adobe Illustrator. I prepared them in 100%K, with line thickness at least 2.5pt+ (for screens with a mech size of 110). I did one design with lines of 1pt, and it worked on paper with acrylic ink, but it didn’t work reliably on fabric. (Although different inks, even from the same brand, are quite different in thickness, so there is variation in how thin you can get away with if you are willing to put up with finickiness)
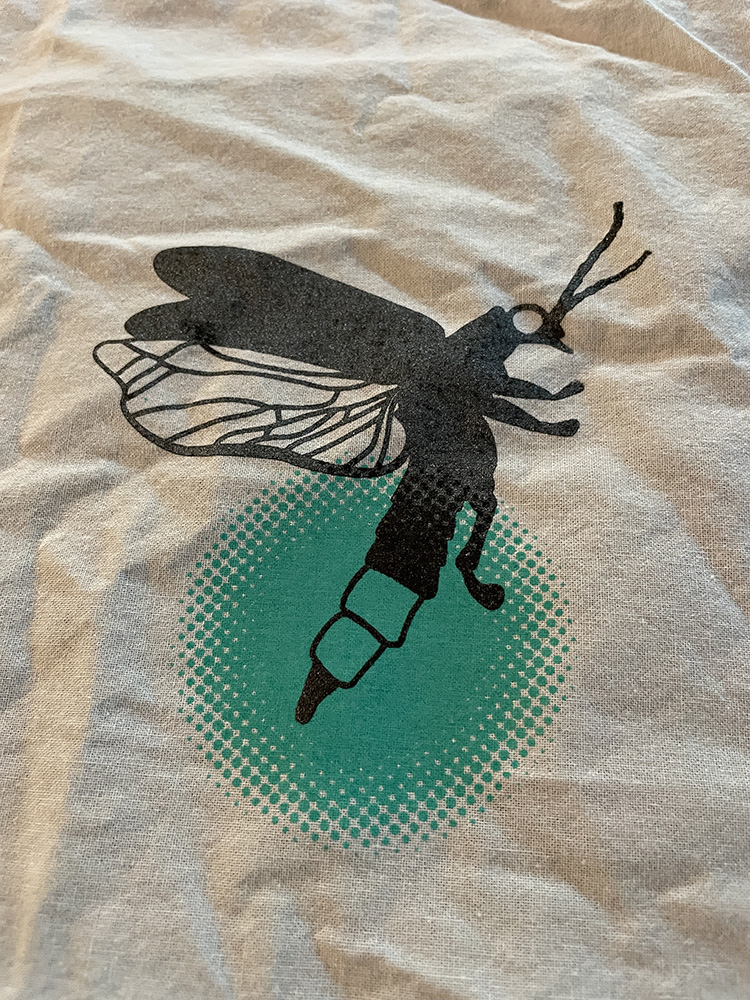
For beginners, we should keep our designs strictly black and white. You can achieve lighter shades of color and fading effects with halftones. There are nice filters in Adobe Illustrator for doing this.
Printing the design on to 'overhead projector film' sheets
Print the artwork on transparency. If you are going to use a light box to expose it from below later, then print the image as regular non-mirror image. If you will be exposing it from the top, print the mirror image. (Ideally, the side of the transparency that was printed should make contact with the screen so that it’s perfectly in focus, hence printing it in the correct orientation. If you had to flip it, I can’t imagine it would really make that big of a difference.)
Layering Transparencies to Insure Opaqueness
If you can see light through the printed areas of your transparency, then you need to print it again and stack them together. You might need 2-4 layers (takes 2 layers for me with my brother color laser printer). I put the transparency in the bottom tray of my printer, with the transparency curving upwards in a rainbow-orientation (it’s a little slippery, so sometimes the printer had to try a couple times to pick it up.). Taping the multiple layers together is surprisingly easy. Use really clear transparent tape (not ‘magic’ tape.) I was worried about perfectly aligning them, but it was actually pretty easy, even when I made design larger than a piece of paper and had to align in the middle of the design.
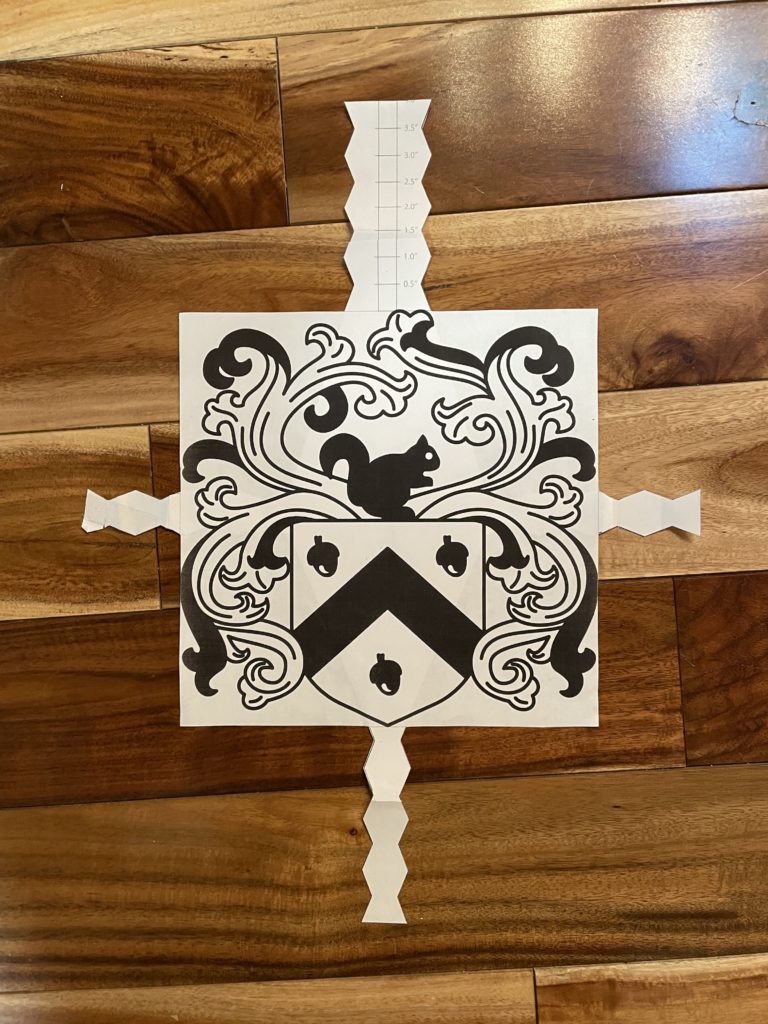
Paper alignment guide
I also printed on regular paper an alignment guide for the design. This was helpful for later aligning the transparency with the screen, but even more so for deciding where on the shirt to put the design.

2. Prepare and degrease Screens
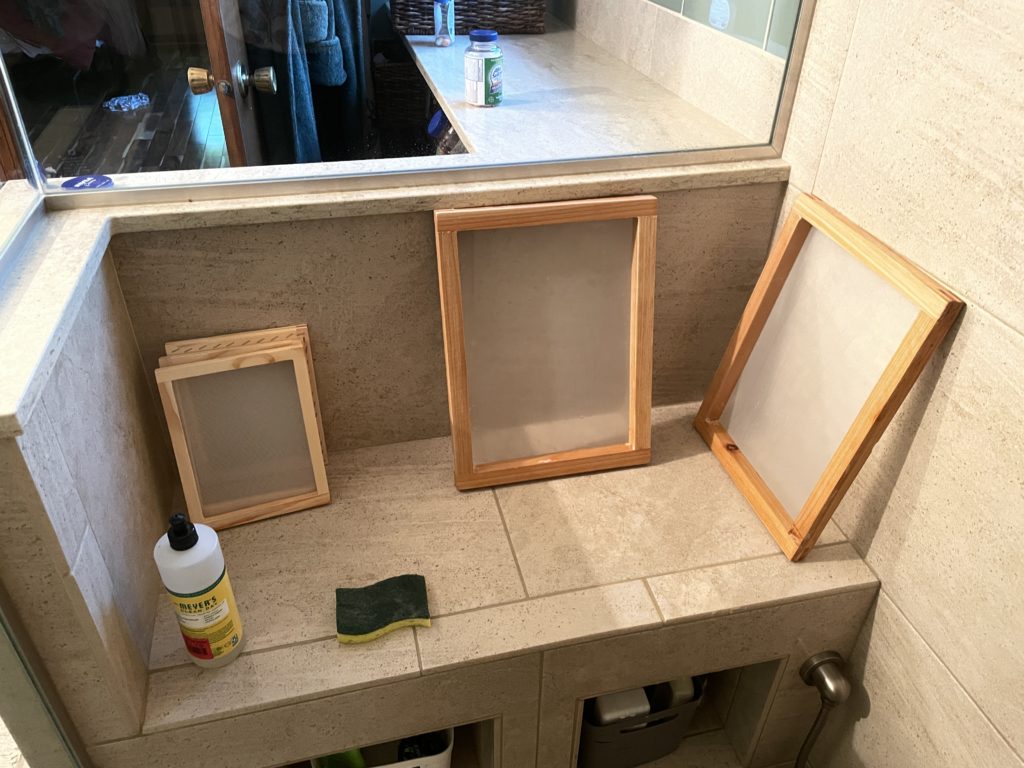
Pre-made screens
I bought pre-made screens on Amazon. It was nice to have multiple of just a couple sizes because I was able to get a nice alignment system going.


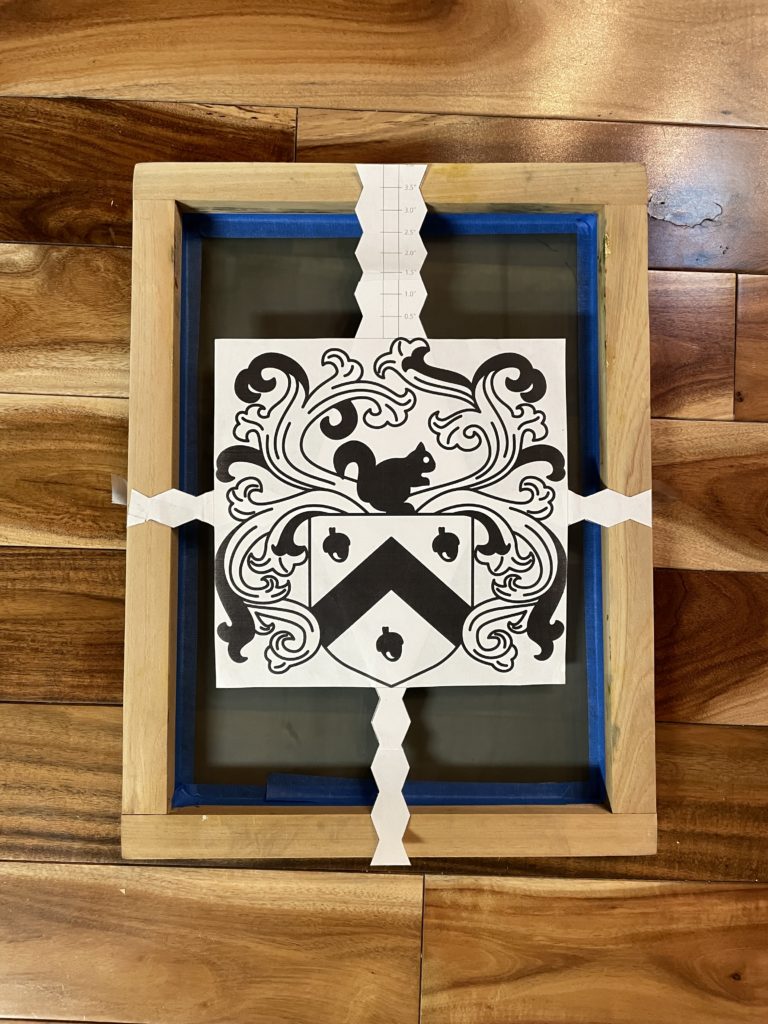
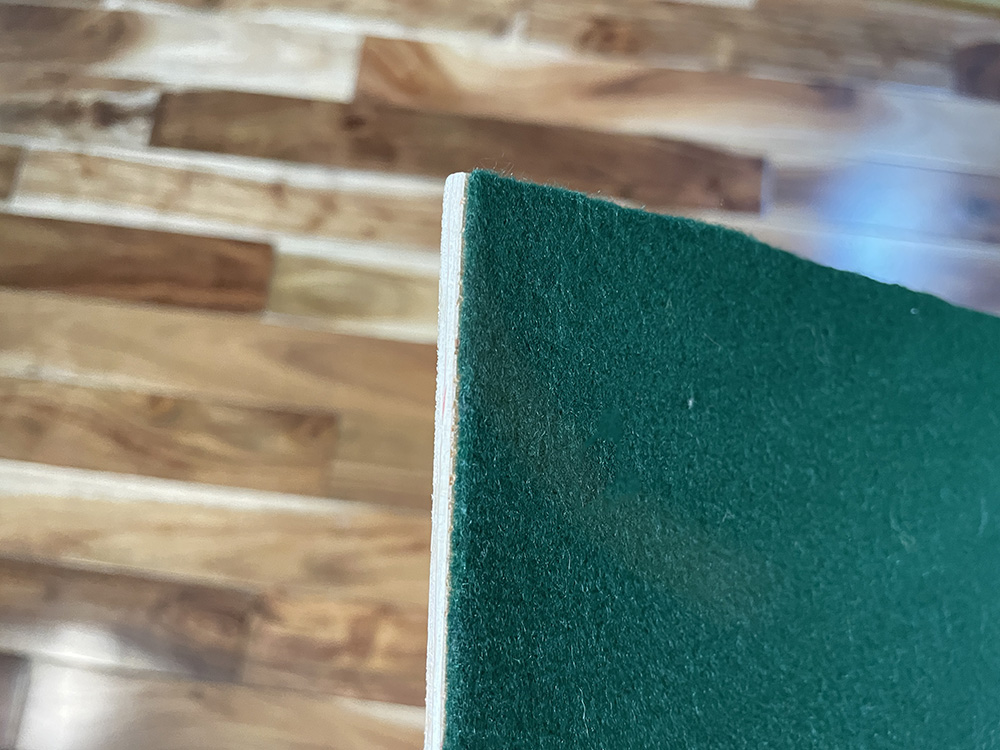
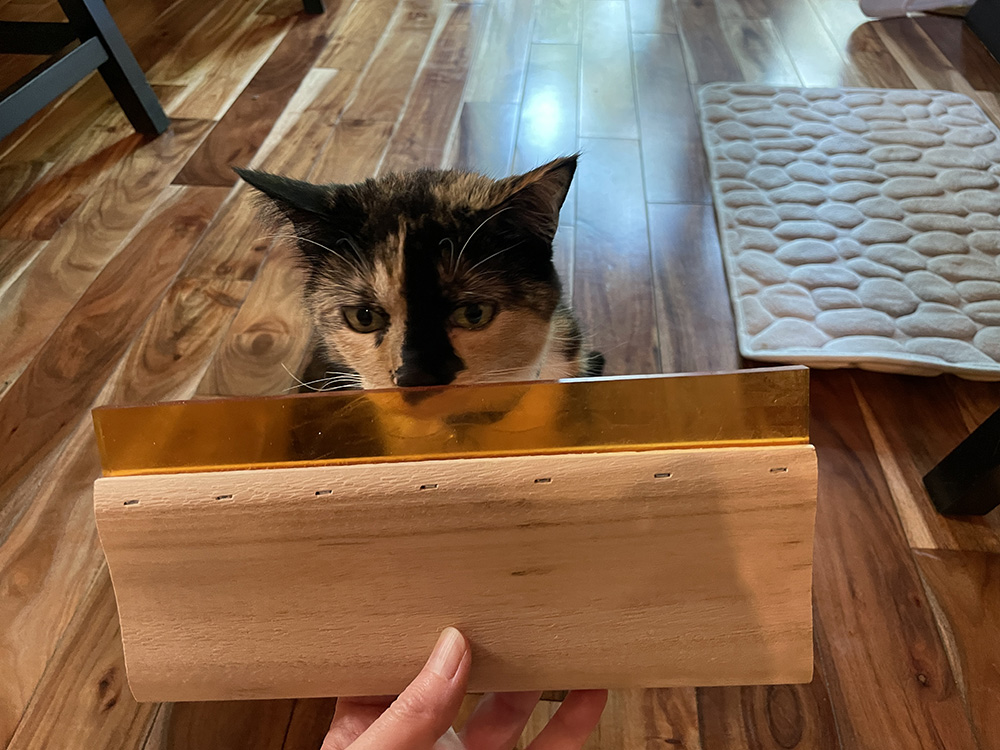
I used 6X8 Screens and 10X14 screens (or without squeegee for later orders). The edges of the chiffon were prone to fraying, so I used a lighter along the edges to stop the threads from coming out (they can get stuck in your emulsion later and give you a headache). These screens don't don't come with any sort of pallet to place underneath your fabric. So I used the table saw at Sector67 to cut some plywood pallets exactly the same size as the frames (to help me with alignment). I have 6 screens in each size, but I only need 2 pallets. I covered the pallets in felt, which lightly gripped the fabric and provided a nice thin cushion to press the squeegee into.
Cleaning the screens
Use a designated sponge and plain dish soap to ‘degrease’ (ie clean) the screens. Scrub both sides with the soap sponge and rinse with cool spray hose, or in shower. Dry fully in a clean location, and don't touch it with your greasy fingers anymore.
3. Sensitize Emulsion
Wear disposable gloves: I’m using Jacquard Emulsion & Diazo and/or Speedball Emulsion with Diazo Sensitizer (The Speedball product requires that you buy two separate products, where as the Jacquard comes with both). Both are very similar, although the smaller size of the Jacquard is nice for hobbyists. They require two parts, and are not activated until mixed. This product requires water to mix with the Diazo first, and ideally distilled water should be used. I don’t personally like how imprecise the water instructions are, so it might please you to know that ¾ full of the Speedball 8.85g Diazo is 53g of water. Then, the diazo is mixed with the photo emulsion to activate it. Stir well, IN LOW LIGHT! The diazo activator is dark army-green, and the un-sensitized emulsion is cyan. Once it’s successfully stirred, it becomes a homogenous green. Let the emulsion mixture stand for 1 to 2 hours before coating the screen.
4. Apply Emulsion to Screens
Lighting while applying photo emulsion to screens
Wear disposable gloves: In a dimly-lit room (not in sunlight), apply the photo emulsion the screen. I have a red-light headlamp that works well for me because I can still see well in it. It might be unnecessarily cautions for this step to do it in total darkness with just a red light, but since I can still see fine, why not be safe?
Don't over apply, and use a scraper
Despite some YouTube videos, you actually want very little photo emulsion on the screen. My first inclination was to apply too much. (Hopefully I don't now convince you to add too little!) Too much is a problem because if any of it drips while drying, you are totally screwed and have to start over. I found that a dough scraper was a fantastic tool for applying it. You could use a couple of index cards, but they absorb a lot of the emulsion and don’t work well at all.
I used a plastic disposable spoon to ladle on the emulsion (like you would use to eat at a picnic): the smaller 6X8 screens used one plastic spoonful, and the larger 10X14 screens used ~2.5 plastic spoonfulls. Even then, both screens required some emulsion to be scraped off with the dough scraper, and then returned to the jar of emulsion. You kind of need to flood the screen holes and then remove all the excess. There should be a ‘zip’ noise as spread it along. If you are hearing the 'zipping,' then you probably removed enough. You only need to spoon the emulsion on to one side, because it will soak through as you spread it.
Spread the Emulsion
Spread the emulsion it all the way to the edges. We will be taping the edges with tape later, but it’s good to have them double protected because it was one of the most common errors I had (getting a stripe of ink on the shirt corresponding to the edge of the frame). Spread the emulsion all around both sides until it’s very even, and all the microholes in the screen appear to be full. Also wipe away drips on the frame or your other stuff because it dries thick and hard. Rinse your dough scrapper immediately so that it doesn’t dry on there. Label the date on the jar of un-used emulsion and put it in the refrigerator. It should last 6 months. I used it once to coat a screen while it was still cool from the refrigerator, and it worked totally fine.
5. Dry Screens
In DARKNESS dry the screens horizontally. The internet says to lay them in the same orientation that they will eventually be used, but it’s a lot easier to put them upside down from that so that you don’t have to worry about the wet screen coming into contact with the floor/table, so that’s what I’m doing and it works fine. Do cover the table/floor with plastic or something you can throw away, just in case you get a drip or swipe of emulsion on there. And, if its handy, it makes sense to put the screens over a couple planks of wood or similar so that in case there is some emulsion on the frame, it won’t get glued down to the surface when it dries (you can leverage off a plank of wood). When the photo emulsion dries, it is like stone: very hard and difficult/impossible to remove from surfaces without chemicals help. Your screens will probably take a couple hours or a day to dry. You can touch it to see if it feels dry. Don’t dry it in a hot place. After it’s dry, you can store it and transport it in a thick black trash bag (like a contractor bag) rolled up (must keep the light out!). Some people say you should expose it within 2 days, but I did some at least 2 weeks later and it was totally fine.
6. Expose the Screen
This must be done in only dim light until you are ready for the big exposure. My basement is very dark, and then I used my red-light headlamp. I can see pretty well with that headlamp, and red light should have no effect at all on the emulsion. (just bright light and/or UV light exposures it).
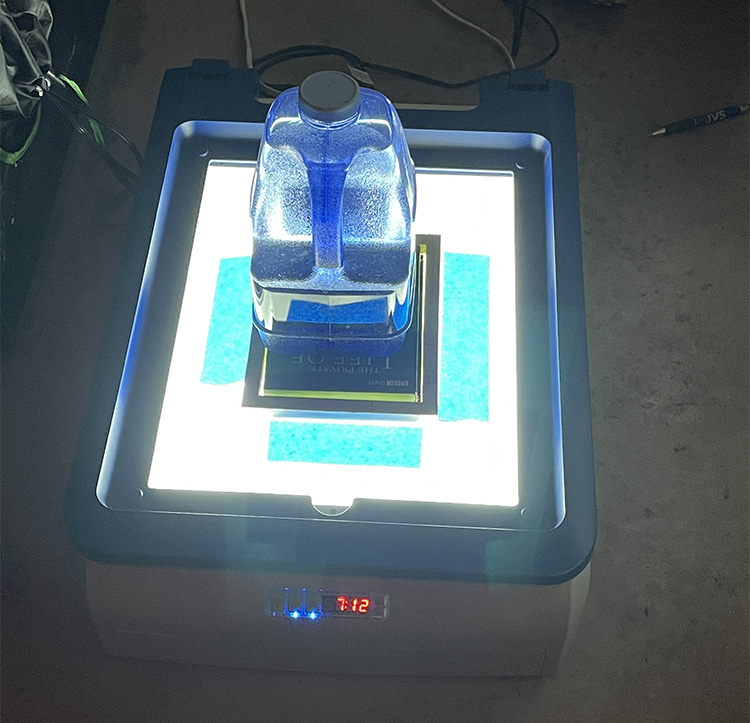
Using a lightbox to expose the screen from the BOTTOM
Tape the transparency to the bottom of the screen, or to the lightbox its self. For me, I set up my alignment relative to the screen, so it was easier to tape it to the screen. Make sure you have the transparency oriented correctly so that it’s won’t be a mirror image when its used for printing. I used my friend’s lightbox to expose the screen from the bottom, which made this much easier. You want the screen and the transparency to be pushed tight together so that the design is in perfect focus. I was able to weigh down the screen from the opposite side than the light using random books (exposing from the front requires using clear materials to press them together). Make sure there is a dark surface on the opposite side of the screen from the light so that you don’t get any bounce-back that blurs your design. I forgot that once, and you could kind of read the word “Chinese Cooking” on the screen (from the cook book), but thankfully the holes weren’t actually open so it printed fine. Laima’s light box that she lent me is great. I used the ‘sun button’ to turn on the light for 7:30 (the default), and it worked great.
Using a light bulb or the sun to expose from the TOP:
I didn’t have to do this, but here is what I learned in my research: If you will be using the sun or an above light, then tape it to that side of the screen. If you have lines thinner than 1/4inch AND you are exposing from the TOP, then you really want a sheet of glass/plexiglass to hold the transparency very very flush against the screen before exposing.
Jacquard recommends a 150-watt clear bulb with reflector for 45-90 minutes, but then they also have this table below with contradictory information. Too much exposure might lose some detail. If you use the sun, try to do it mid day so that the light is coming downwards.
| Light Source | Distance From Screen | Exposure time |
| 200 watt incandescent | 24 inches | 22-25 minutes |
| 150 watt incandescent | 24 inches | 30-33 minutes |
| 100 watt indoor flood | 18 inches | 50-55 minutes |
| 60 watt indoor fluorescent | 18 inches | 45-48 minutes |
| sunlight | 94.372 million miles | 10-15 seconds |
7. Rinse the screen
Once back in a darkish place, remove the glass/plexiglass/books and untape the transparency. Rinse out the un-hardened emulsion in darkness or dim light using COLD water (I think many screen pirnitng facilities are plumbed with only cold water, so that’s what they use. Maybe warm water would be fine too, but I didn’t test it). Spray with the highest pressure sprayer you have. I like to wet the screen with the basement sink faucet for a couple mins, and then spray with the hose sprayer in the basement. That works really fast and nice. If you don’t have enough water pressure, you might have to wipe with clean sponge (an iffy choice), or be patient.
Consider putting it back out in the sun to finalize the hardening of anything (I didn’t bother doing this and it was fine). Make sure it’s dry before printing. Check the screen carefully for pinholes. Cover any pin holes with more emulsion, let it dry, then expose to light. Or cover unwanted holes with masking tape on the bottom side.

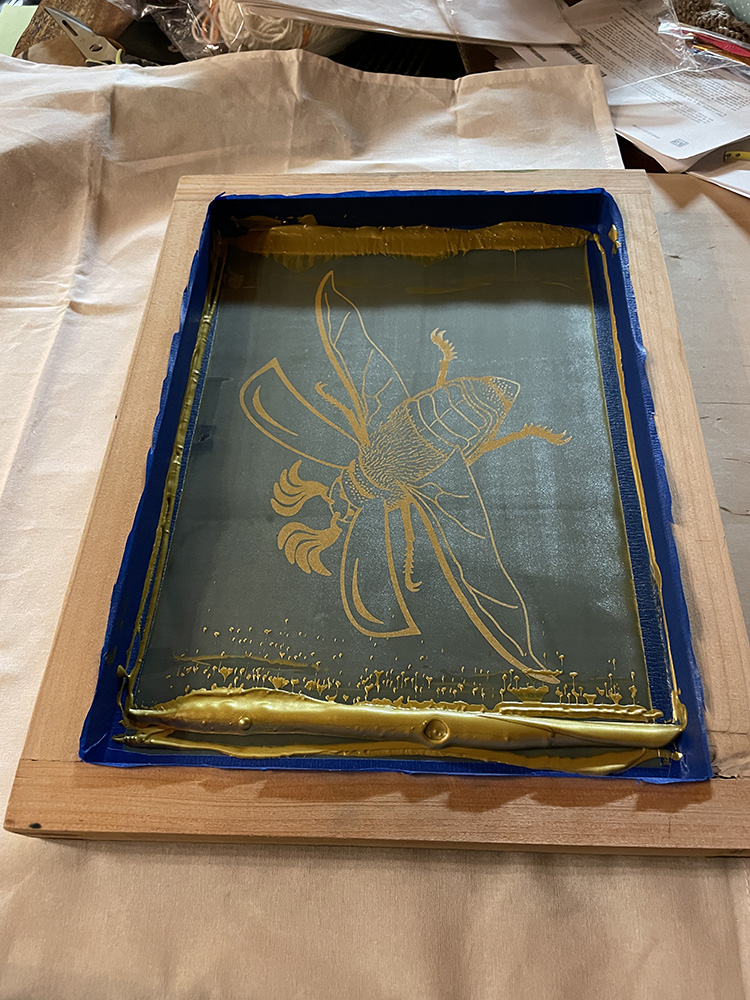
☛Very importantly, tape off the edges of both the inside and outside with nice quality masking tape.
8. Printing with water Soluble Ink (like Speedball or Jacquard)
First, check that the masking tape around the edges of your screen is good (it’s common to get an unwanted line on the side of your design). With use, this tape can tear or wash-loose and need to be reapplied.
☛ It’s really nice to have a piece of plywood (a pallet) the size of your screen. I used the table saw at Sector67 to cut a piece of scrap the same size as my screens. Here is where it was very nice to have a bunch of matching screens (just needed 2 pallets). I used spray adhesive to permanently glue a piece of felt fabric to my pallet, and that has worked really nice. This pallet helped me align my design, and also worked as a ironing board surface, which you need when doing backyard screen printing. See step 2 for more photos of these pallets.
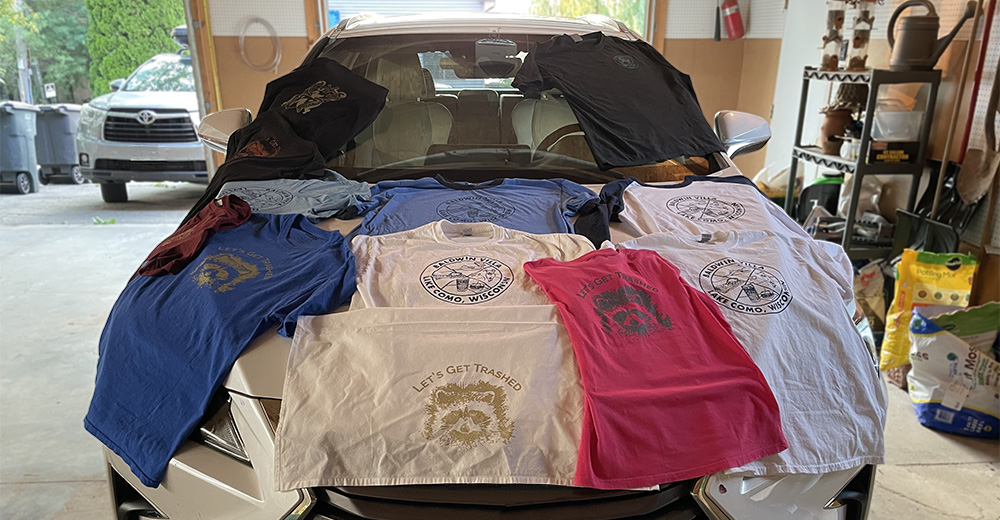
New Shirts or Old Shirts?
If the T-Shirt is brand new, it's ideal if you can wash and dry the shirt before hand. That way it gets it's shrinking out of it's system before the design is applied. However, we did fine with printing brand new shirts too. Tea Towels, on the other hand, shrink like 20% and I think pre-washing it quite important with those. You can print on really old T-Shirts that you've worn a million times too. The only downside I noticed is that a halo of fuzz can form above the surface of old shirts, and you print this halo instead of the real shirt surface. So, maybe it turns out a little less crisp and less opaque as a brand new shirt, but I'd say it looked good enough and was still worth doing.
What type of fabric can the shirts be made out of?
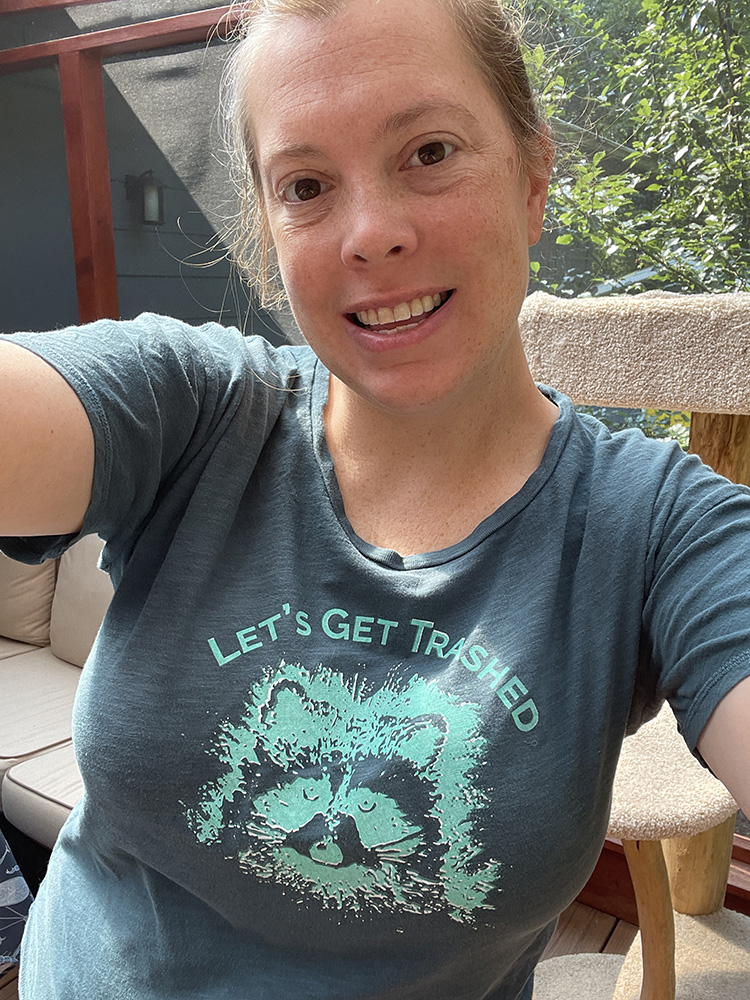
My family brought all different types of shirts made of many materials (from synthetic athletic-wear to regular cotton), and it seemed like they all printed just fine with the Speedball and Jacquard water-based fabric inks. Hopefully they are all continuing to hold up well to washing machines. I'm sure there are some fabrics that won't work, but it seemed like a broad range of success to us.
How to align the screen frame with the part of the shirt where you want the design
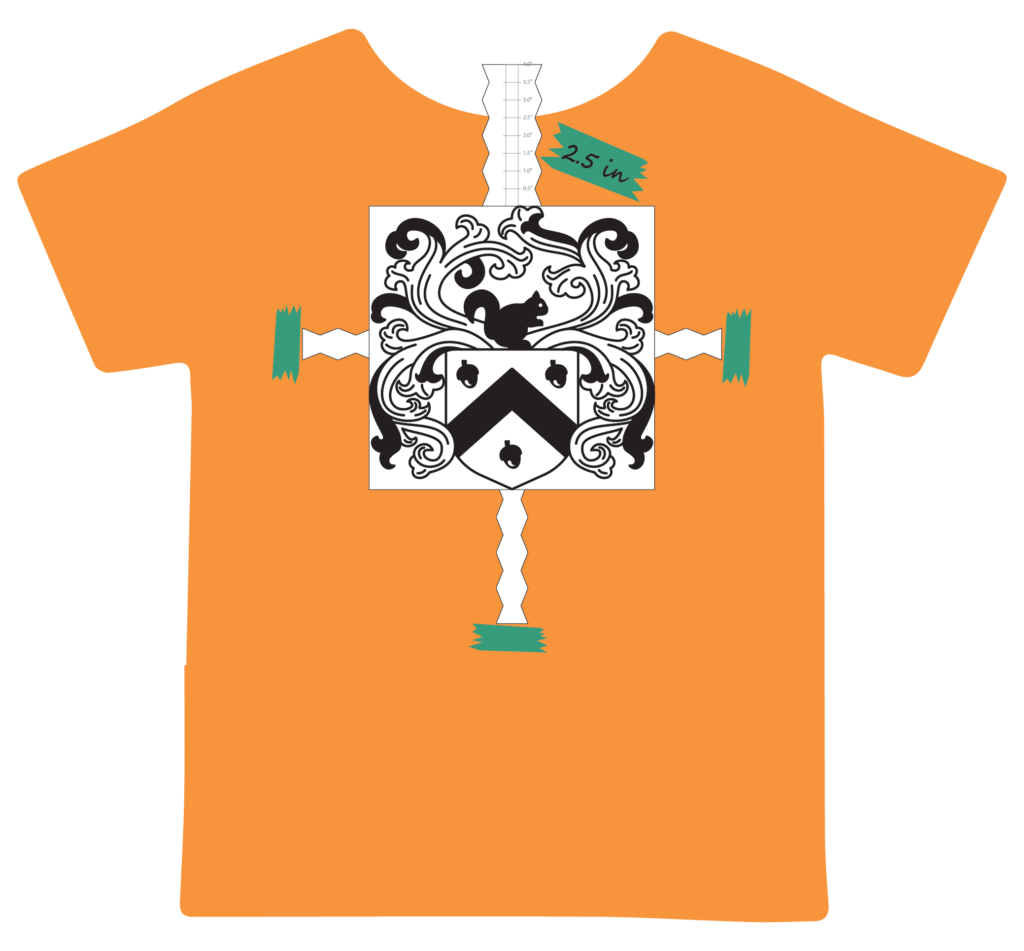
In order to pick what part of the shirt should have the design, I would have my family member (or someone of similar build) try on the shirt. Then I would hold up my paper alignment guide. Then I would put a piece of masking tape just to the side of the guide on both sides and the bottom. Often the top of the alignment piece extends above the neck collar. In that case, I would write down the measurement number from my alignment paper on a piece of tape for future reference.
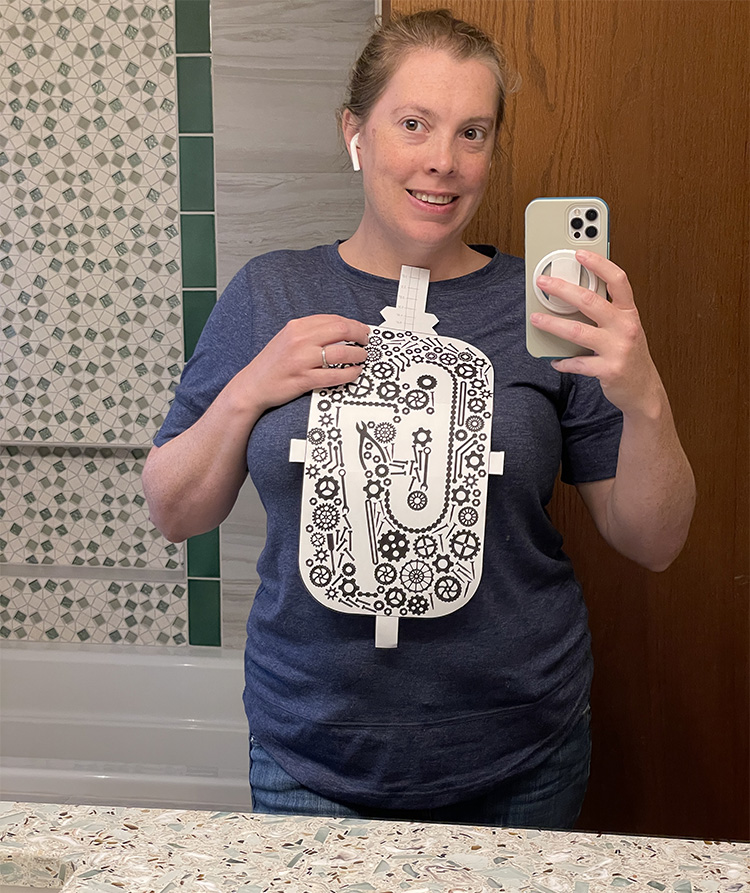
Then the person removes the shirt, and I put the shirt over the pallet (so that the pallet is in between the front and the back, inside the shirt. This is because ink can permeate the first layer of fabric and mark up the inside of the back layer.). Position the shirt on the pallet just right relative to your tape marks. Use the paper cut out and the measurement from the neck. There is a little compromise involved because the shirt material is stretchy. Having both the top measurement and the bottom tape lets you split the difference.

Once you feel good about the position of your pallet, you can use your finger’s sense of touch to perfectly lay down the screen right the first time, even if it already has wet ink on it. If it doesn’t have ink on it yet, you can position it and move it around until you like it.
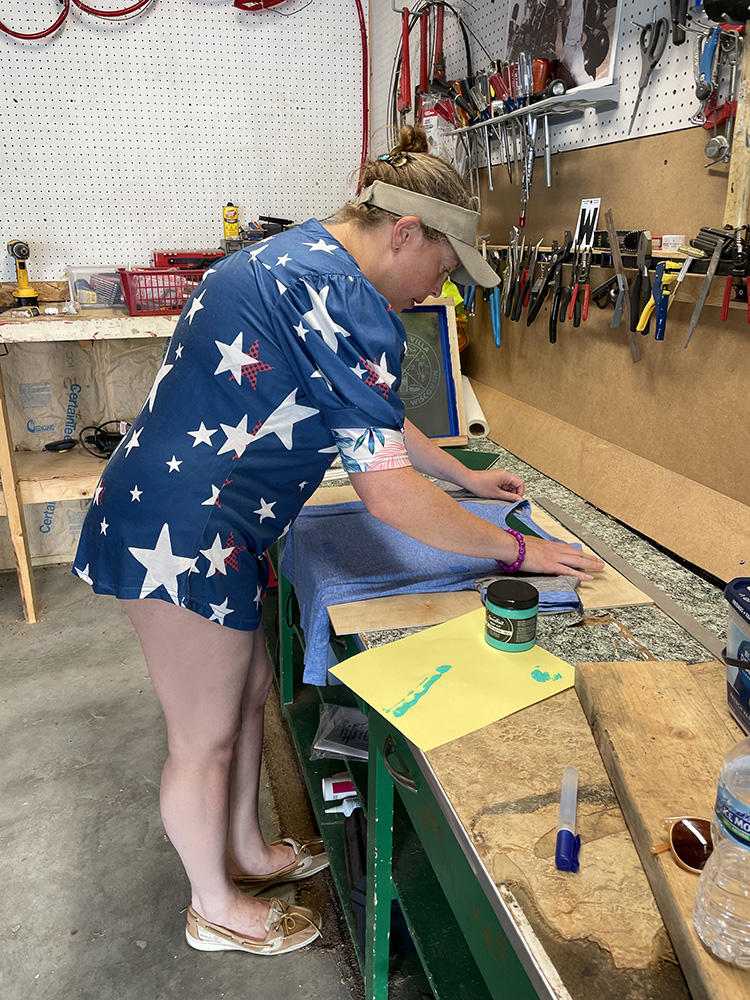
Applying the ink to the screen
Once the screen is down on top of the shirt, use a disposable spoon to apply a goopy line of ink above the design on the screen (be generous because you will be retrieving most of the unused ink).
Squeegeeing
Hold your squeegee at 45 degree angle and drag the ink over the design while pressing quite firmly. (For the 6X8 screens, you can use the same dough scraper as a squeegee. Works great.) Then drag it back up. On the way up, maybe don’t press so hard. I’m not sure if going in 2 directions makes it more likely to blur slightly. I haven’t noticed that, but it is a theoretical concern. Do ~4 drags total. Without moving the screen, you can look at the design and get some idea if it’s sticking and holding ink. FYI: Professionals flood the screen with ink BEFORE letting the design touch the shirt. However, with my set up, that technique was bad. Pre-flooding the screen made the ink go through the holes and then gloop up on the backside of the screen. When it was laid down on the shirt, a nasty gloopy version of my design would print.
Use your plastic spoon to scoop up any excess ink and plop it back in the ink jar. Also scrap down your squeegee back into the jar of ink.
After you are done with your drags, pick up the screen in a quick motion so that you don’t get a ripple effect on the print as the screen pulls away in segments. I recommend lifting from the narrow end of the screen to help this (like from the bottom to the top).
What if I messed up?
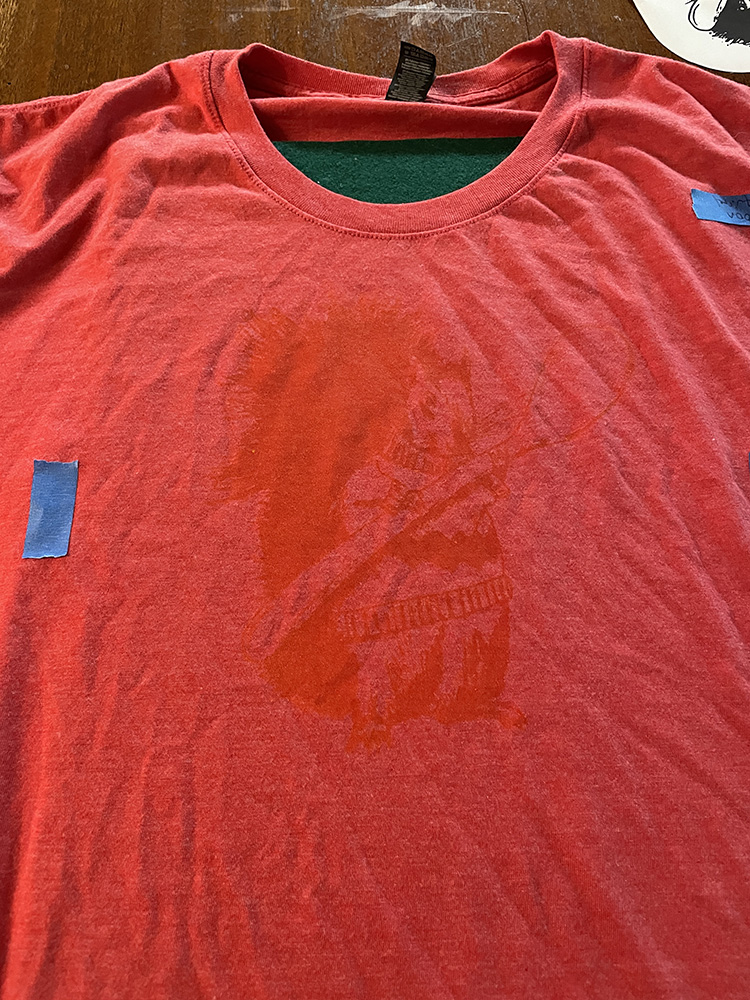
☛ Before it’s heat set, the ink is still water soluble. This means you might be able to save your shirt if you mess up. If you find an unwanted line of ink on the side of your design on the shirt (where your masking tape failed), quickly try to scrub it away with a wet sponge. This is tricky but can save the shirt. Or, if you find that your ink color choice was terrible and you can barely see the design (perhaps you were led to believe the ink was opaque but’s really transparent), you can put the shirt in your washing machine on cold cycle (I worry the hot cycle could heat set the ink!) and hope for the best. This worked perfectly for me once. The shirt looked brand new again. Another time I tried it, you could still see the ghost of the old design. I think it just depends on the ink color.
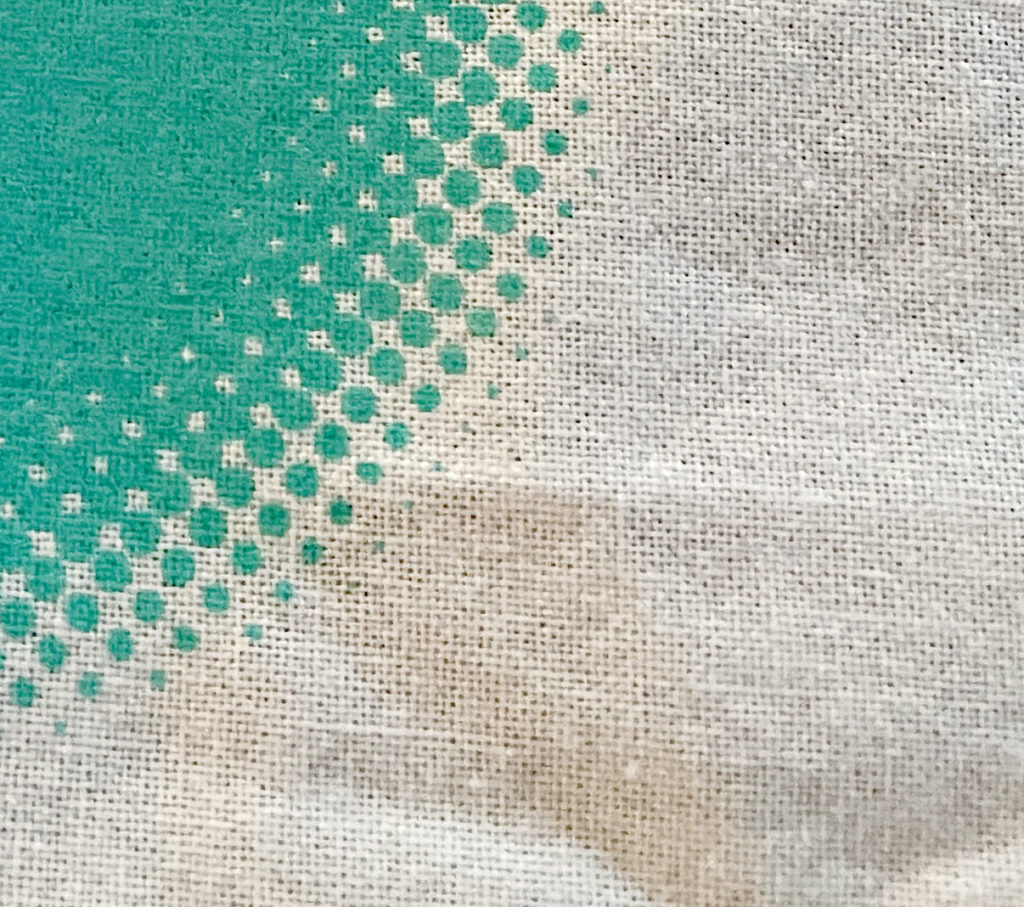
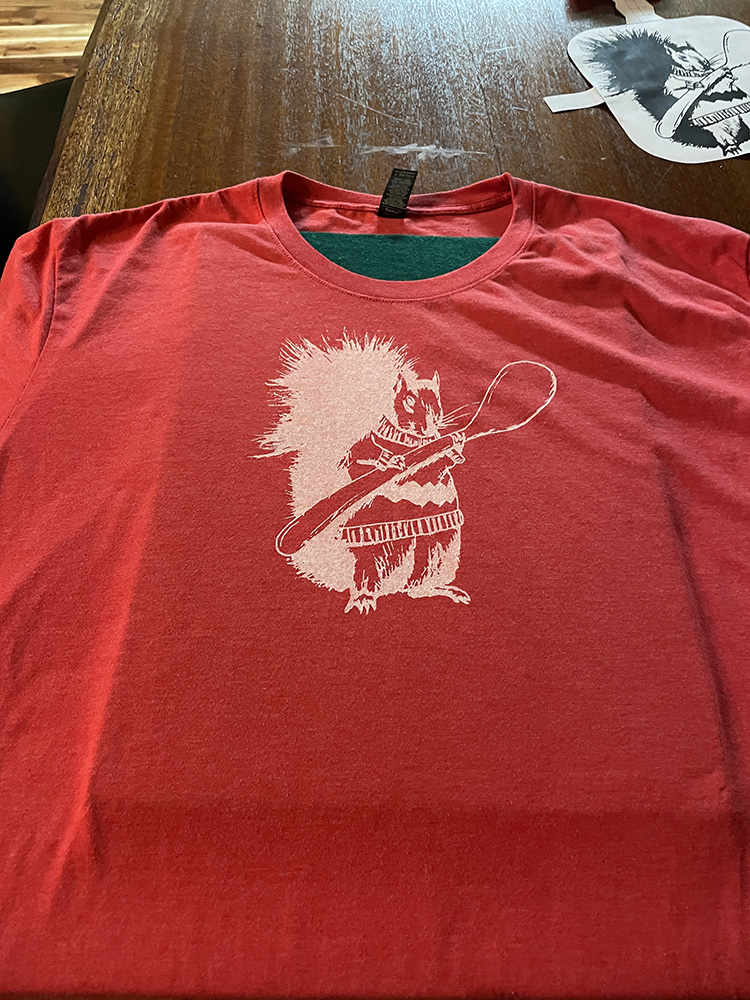
Semi-Transparent ink on colored shirts
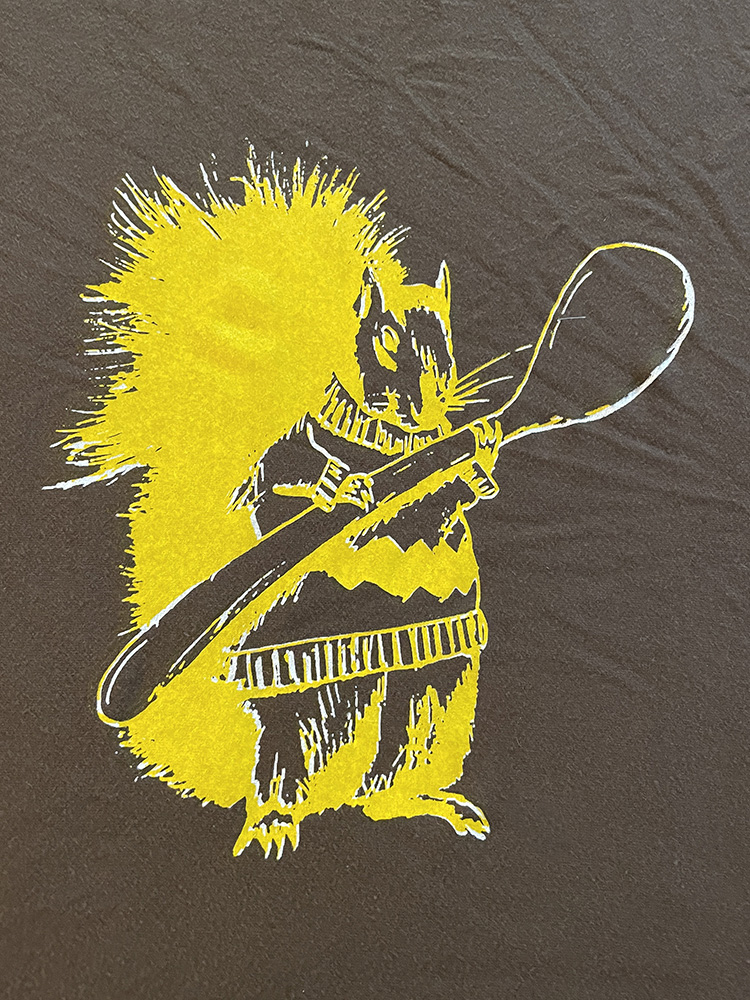
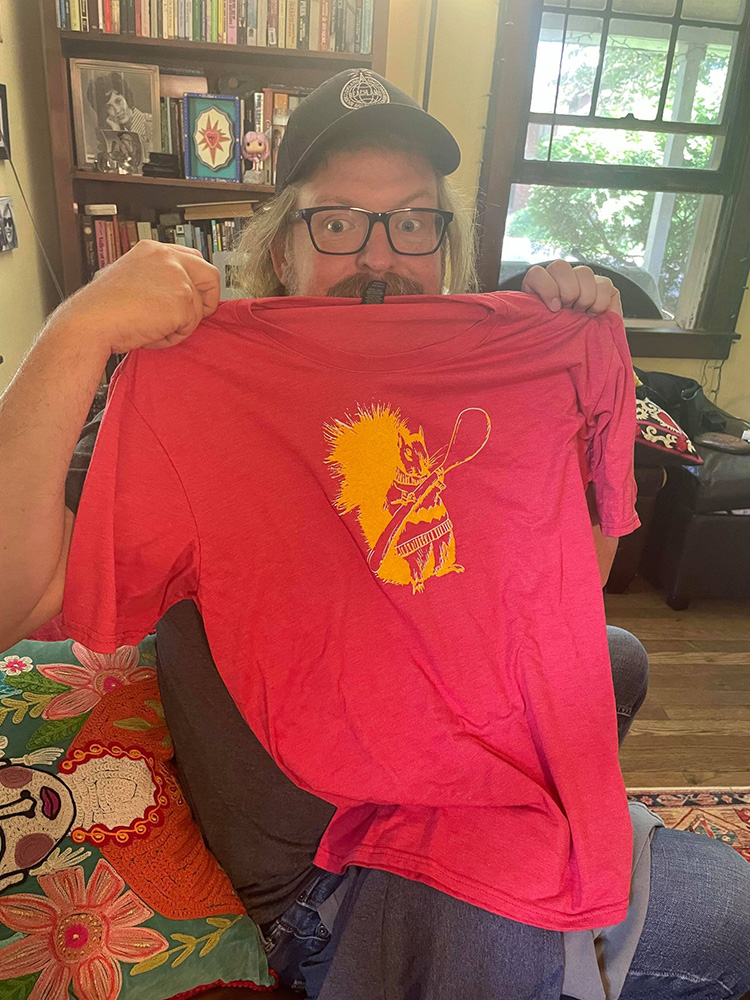
Some ink colors are more opaque than others. The Jacquard golden yellow was basically totally transparent; it really has to go over white. Same with the speedball green glow-in-the-dark (which still glowed on darker fabrics, but was really hard to see in light). So, I printed in white ink first and let it dry. Then I did the yellow over it. With this simple alignment strategy, you can’t get it perfectly re-aligned again. But, it actually looked pretty cool for more sketchy-style designs.
Printing Multiple Shirts in a Row
If you are doing a second shirt in the same color, work quickly! If the ink dries on the screen at all, your prints will start to look grunge-style. Someone told me to spray my screen with a mist of water to keep the ink liquid in between screens, but that was a terrible idea because it got inky water on the back of the screen. You can now repeat for many prints of that color in a row, just make sure you have the shirt well-arranged on the pallet and then plop down the screen decisively. For these secondary prints, you can only put the screen down once and there is has to stay. Once done with that color, immediately wash the screen. Use a dedicated scrubby sponge to wash it. Warm water is fine (or cold if that’s what you have). You can use dish soap if needed. Some inks are more stubborn than others.
What the ink partially dries on the screen?
The Jaccard copper ink is a beautiful color, but it dries way too fast and ruins your screen. This happened once even when I was only printing one shirt. RUN to the sink after your print if you are using this ink. If ink does dry in holes of your screen, you can try detergent and sponge to get it out. If that doesn’t get it out, you will have to pressure wash the screen. My pressure water worked to remove the dried ink, but it also completely removed the emulsion. So, I had to re-expose the screen. At least the screen its self was reusable.
9. Heat-set the ink
This is only necessary for fabrics and things that will be washed later (in order to make sure the ink does NOT wash away). Paper prints don’t need to be heat set. Let the shirt air dry. Cover your shirt with parchment paper, or regular printer paper and then iron on the appropriate setting for the material of your shirt (ie cotton-setting) for 3 minutes. Then, turn the shirt inside out and iron the backside too for 1 min. On thin, or “burn out”-style shirts, put another layer of parchment paper inside the shirt to protect the back (ironing it can make the ink seep through the shirt and stain the other side).
The felt-covered plywood pallet works really well as an ironing surface.
10. Using your screen again later or for a different color print
After the screen has been rinsed clean with cold water, let it dry. (I think it would probably be OK to use warm water too, but many screen printers seem to only have a hose with cold water). Then you can use it again anytime with a different color of ink. Drying in the sun takes less than 30min, or a fan really helps too.
11. Reclaiming the screen
If you plan to never use that design again, you can reclaim the screen and start over again with a new design. The longer the emulsion is on the screen, the more time and scrubbing will be required. Use commercial emulsion remover: pour some on a sponge and rub it on the screen. Let it sit on there for 3-5minutes. Scrub the screen with a scrubber sponge to remove all emulsion. Rinse and dry thoroughly before reapplying emulsion. An electric pressure washer can also be used to remove emulsion, but it might age the screen faster.